
How to Sell Patches Online Successfully (From Zero to Sales)
Custom Patch House22 min read
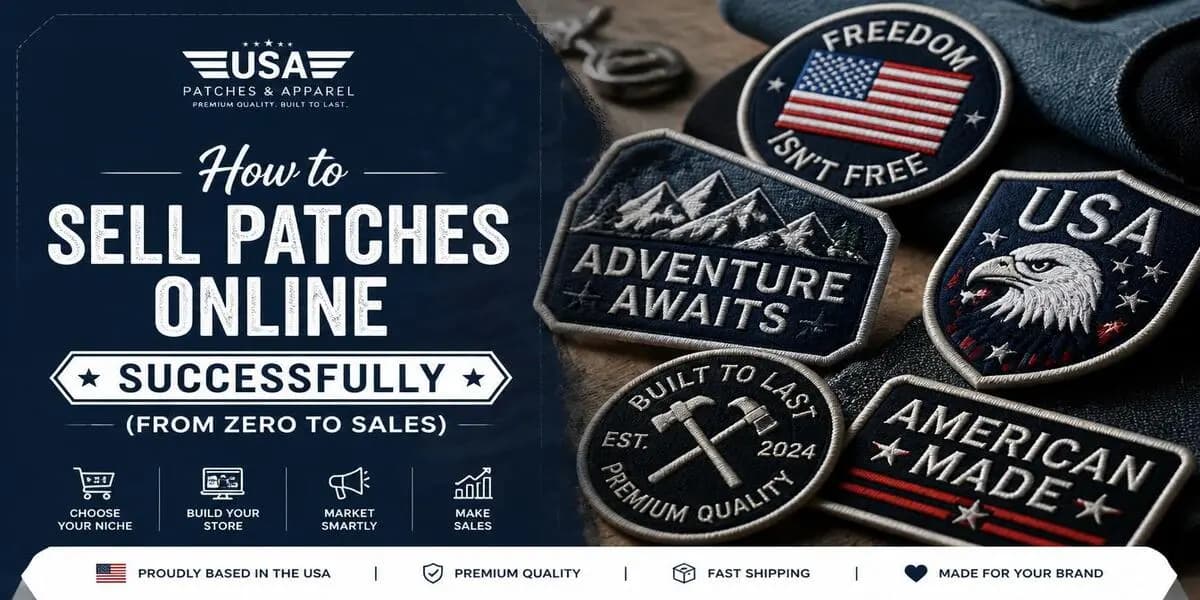
Patches are one of the easiest products to start selling. They're small, light, cheap to ship, and people collect them for identity, belonging, and style. But knowing how to sell patches online is different from knowing how to make a cool design. Plenty of sellers order 100 patches, list them on Etsy, and hear nothing but crickets.
This guide walks you through the whole process, from choosing a niche and pricing for profit to picking a platform and landing your first ten customers. Whether you're an artist, a small brand, or a side hustler starting with zero experience, you'll finish with a clear, repeatable plan.
Quick Answer: How Do You Sell Patches Online?
To sell patches online, follow six steps:
Pick a specific niche, such as bikers, hikers, gamers, or a fandom.
Create a clean vector design sized for where the patch will be worn.
Order samples from a reliable manufacturer, then place a small first batch.
Price each patch at about 3 to 5 times your total landed cost.
List it on a marketplace like Etsy, or on your own Shopify store, with sharp photos and keyword-rich descriptions.
Promote it through short-form video, niche communities, and email.
Most new sellers can go from idea to first sale in 30 to 60 days.
Why Selling Patches Online Is a Smart Business
Before we get into the steps, here's why patches work so well as an online product.
Low startup cost. You can launch a first run of 50 to 100 patches for a few hundred dollars, far less than apparel or electronics.
Strong margins. A patch that costs $1.50 to $3.00 to produce often sells for $8 to $15 at retail.
Cheap, easy shipping. Patches are flat and light, so they fit in a padded or rigid envelope. That keeps shipping costs low and makes free shipping realistic.
Built-in collectibility. Patch buyers rarely stop at one. Hikers collect trail patches, bikers build vests, and fans complete sets. That means repeat customers.
Free marketing. Every patch sewn onto a jacket or backpack is a small walking billboard for your brand.
Many sales channels. You can sell to individuals (B2C), and also to clubs, teams, and businesses that need bulk custom orders (B2B).
Step 1: Choose a Profitable Patch Niche
The biggest mistake beginners make is selling "cool patches for everyone." Generic designs get lost. A focused niche helps you design for real buyers, find them online, and rank in search.
Popular patch niches that sell well:
Motorcycle and biker patches: vest patches, rockers, ride-themed designs
Morale and tactical patches: hook-and-loop patches for military, law enforcement, and airsoft fans
Outdoor and travel patches: national parks, hiking trails, camping, fishing
Fandom and pop culture: original designs inspired by gaming, anime aesthetics, or music genres (not copied characters; more on that in the legal section)
Humor and meme patches: funny slogans for backpacks and jackets
Aesthetic and fashion patches: cottagecore, punk, y2k, minimalist line art
Pets and animals: breed-specific dog patches, cat lover designs
Causes and identity: pride, mental health awareness, recovery milestones
Clubs, teams, and organizations: Scouts, sports teams, schools, and companies (usually custom bulk orders)
How to validate a niche before spending money:
Search Etsy for your idea. If there are listings with many reviews, there is demand. If there are thousands of near-identical listings, you'll need a sharper angle.
Check Reddit, Facebook groups, and Instagram hashtags in your niche. Are people posting their patch collections?
Look at Google Trends for seasonal patterns. For example, hiking patches peak in spring and summer.
Ask your audience. A simple Instagram story poll ("Which design should I make?") is free market research.
Tip: Pick a niche you understand personally. If you ride, hike, or game, you'll know the inside jokes and references that make a patch feel authentic.
Step 2: Design Patches People Actually Want to Buy
Your design is your product. A patch that looks great on screen can look muddy at 3 inches wide once it's stitched, so design with the physical product in mind.
Design rules for sellable patches:
Keep it simple. Bold shapes and thick lines hold up best. Tiny text under about 5mm often becomes unreadable in embroidery.
Limit colors. Around 3 to 7 colors keeps the design clean and the cost down. Many manufacturers price by color count and stitch count.
Use strong contrast. Light-on-dark or dark-on-light reads well from a distance.
Design in vector format. Save as AI, EPS, SVG, or PDF so lines stay crisp. If you only have a sketch, many manufacturers offer vector conversion or digitizing services.
Match size to use. Common sizes are 2 to 3 inches for hats and bags, 3 to 4 inches for jacket chests and sleeves, and 10 to 12 inches for back patches.
Consider shape. A custom die-cut shape stands out more than a basic circle and makes the patch feel more collectible.
Not a designer? You have options:
Hire a freelancer on Fiverr, Upwork, or Dribbble.
Use free design support from your patch manufacturer (many offer it).
Sketch a rough concept and let a digitizer turn it into production-ready artwork.
Always ask for a digital proof before production, and check spelling, colors, and size carefully.
Step 3: Choose the Right Patch Type
Different patch types suit different audiences and price points. Choosing the right one makes your product feel premium and fit for purpose.
Patch Type | Look and Feel | Best For | Price Tier |
Embroidered | Classic raised thread texture | Jackets, hats, biker vests, general merch | Low to mid |
Woven | Flat, fine detail, thin threads | Detailed logos, small text, brand labels | Low to mid |
PVC / Rubber | Flexible, waterproof, 3D molded | Tactical gear, outdoor brands, bags | Mid |
Chenille | Fuzzy, varsity-style texture | Letterman jackets, retro streetwear | Mid to high |
Printed / Sublimated | Full-color photo-level detail | Gradients, complex artwork | Low |
Leather | Stamped or laser-engraved, premium | Hats, denim, luxury branding | Mid to high |
3D Embroidered (Puff) | Raised foam under stitching | Hats, bold logos | Mid |
Beginner recommendation: Start with embroidered patches. They're the most recognized, the most searched, and the most versatile. Add PVC or chenille later once you know what your audience likes.
Step 4: Pick the Right Backing
Backing affects how customers attach the patch, and it's a common question in reviews. Choose based on how your buyers will use it.
Iron-on (heat seal): Easy for casual buyers, great for fashion and DIY customers.
Sew-on (no backing): The most durable. Preferred by bikers and collectors.
Hook-and-loop (Velcro): Essential for morale and tactical patches, since buyers swap patches on their gear.
Adhesive (peel-and-stick): Temporary use, events, and giveaways.
Magnetic or pin backing: A niche option for bags and uniforms without stitching.
Pro move: Offer iron-on and hook-and-loop versions of the same design as separate variants. It widens your audience without new artwork.
Step 5: Source and Manufacture Your Patches
Your supplier decides your quality, your turnaround time, and your profit margin. You have two main paths.
Option A: Order from a patch manufacturer (recommended for most beginners).
You send the design and they produce, finish, and ship the patches. There are no machines to buy and no skills to learn. Minimum order quantities (MOQs) usually start somewhere between 10 and 100 pieces, and per-unit cost drops sharply as quantity rises.
Option B: Make patches yourself.
You'll need an embroidery machine, digitizing software, and practice. This suits people who want total control or one-off custom work, but it's slower and harder to scale.
Option C: Print-on-demand (POD).
Some POD platforms offer patches with no inventory. Margins are lower and quality control is limited, but it's a zero-risk way to test designs.
Supplier checklist before you commit:
Do they offer a free digital proof and unlimited revisions?
Can you order a physical sample before a full run?
What's the MOQ, and how does price change at 50, 100, and 500 units?
What's the turnaround time, including shipping to you?
Do they offer all the backings you need?
Can you see real customer reviews and photos, not just mockups?
How do they handle defects or misprints?
Always order samples first. Holding the real patch lets you judge thread quality, edge finish (merrowed or laser-cut), and color accuracy. You'll also use the samples for product photos.
Step 6: Price Your Patches for Profit
Pricing too low is the fastest way to work hard and earn nothing. Use this simple formula.
Landed cost per patch = manufacturing cost + inbound shipping + packaging + platform/payment fees
Retail price = landed cost × 3 to 5
Worked example (100 embroidered patches, 3 inches, iron-on):
Cost Item | Total | Per Patch |
Manufacturing (100 units) | $180.00 | $1.80 |
Shipping from manufacturer | $20.00 | $0.20 |
Packaging (backer card, sleeve, sticker) | $40.00 | $0.40 |
Estimated platform + payment fees (on a $10 sale) | — | ~$1.00 |
Landed cost | ~$3.40 | |
Suggested retail price | $10 to $12 | |
Profit per patch at $10 | ~$6.60 |
If you sell all 100 at $10, that's roughly $660 in profit from a $240 upfront investment. That's before any bundles or upsells.
Platform fees change often, so check the current fee pages for Etsy, Shopify, or whichever platform you use, and adjust your numbers.
Pricing strategies that increase revenue:
Bundles: "Pick any 3 for $25" raises your average order value.
Limited editions: Numbered or one-time runs justify higher prices.
Tiered bulk pricing: Offer discounts at 10+, 25+, and 50+ pieces for clubs and teams.
Free shipping thresholds: "Free shipping over $25" pushes buyers to add one more patch.
Step 7: Choose Where to Sell Patches Online
You don't need to be everywhere. Start with one or two channels and do them well.
Platform | Best For | Pros | Cons |
Etsy | Beginners, handmade and niche designs | Built-in buyers searching for patches; quick setup | Listing and transaction fees; lots of competition |
Shopify / own website | Building a brand long term | Full control, higher margins, own customer data | Monthly cost; you must drive your own traffic |
Amazon Handmade | High-volume, broad designs | Huge audience | Application process; strict rules; price competition |
eBay | Collectible, vintage, and biker patches | Strong collector community | Less brand-building potential |
Instagram & TikTok Shop | Visual, trend-driven niches | Discovery through content; social proof | You rely on algorithms and consistent posting |
Events and pop-ups | Local testing and cash sales | Instant feedback; no fees online | Travel and booth costs |
Best combo for beginners: Launch on Etsy for its built-in search traffic, and build an Instagram or TikTok presence at the same time. Once you have steady sales and a following, add your own Shopify store. This lets you keep more profit and own your customer list.
Step 8: Create Product Listings That Convert
Your listing does the selling while you sleep. Treat it like your storefront window.
Product photos (the most important part):
Use natural light and a clean, neutral background.
Show at least 5 images: front, back (showing the backing), a scale shot next to a coin or ruler, a lifestyle shot on a jacket, hat, or bag, and a close-up of the stitching.
A short video (5 to 15 seconds) of the patch being handled boosts trust and conversions.
Titles that get found:
Put your main keyword first, then the details.
Example: "Mountain Hiking Patch – Embroidered Iron-On Patch for Backpacks & Jackets – 3 Inch Outdoor Adventure Patch"
Descriptions that answer every question:
Buyers bounce when they have to guess. Always include:
Exact size in inches and centimeters
Patch type and material
Backing type and simple application instructions
Where it looks best (jacket, hat, bag, vest)
Processing and shipping times
Care instructions (for example, wash inside out and avoid high heat)
Keywords and tags:
Use the phrases real buyers type: "iron on patch," "embroidered patch for jackets," "hiking patch," "morale patch Velcro," and so on. Etsy's search bar autocomplete and tools like eRank or Marmalead can help you find them.
Step 9: Market Your Patches and Get Your First Sales
Great products don't sell themselves; visibility does. Here's how to market patches without burning cash.
1. Short-form video (TikTok, Instagram Reels, YouTube Shorts)
Patches are highly visual and satisfying to watch. Content ideas that perform well:
Ironing a patch onto a jacket (a before-and-after transformation)
Unboxing a fresh batch from the manufacturer
"Design to patch" process videos
Collection reveals and "patch jacket" tours
Packing orders (ASMR-style packing videos are popular with small shops)
2. Niche communities
Join the Facebook groups, subreddits, and Discord servers where your buyers hang out. Contribute first and sell second. Share your designs when it's welcome, and follow each group's self-promotion rules.
3. User-generated content (UGC)
Include a small card in every order asking buyers to tag you when they wear the patch. Repost their photos. Real people wearing your patches is the strongest social proof you can get.
4. Email marketing
Start collecting emails from day one with a small incentive, like 10% off the first order. Email is ideal for new drops, restocks, and limited editions because you own the list and don't depend on algorithms.
5. Collaborations
Partner with micro-influencers, artists, clubs, or small businesses in your niche. A collab patch drop with a hiking YouTuber or a local motorcycle club can sell out a batch in days.
6. SEO and content
If you have your own website, publish helpful blog posts your buyers are searching for, such as "how to put patches on a jacket" or "best patches for hiking backpacks." Content like this keeps bringing in free traffic for years.
7. Paid ads (only after you have proof)
Once a design sells organically, test small budgets on Etsy Ads, Meta Ads, or TikTok Ads. Never pour money into ads for an unproven product.
Step 10: Nail Packaging, Shipping, and Customer Service
A great unboxing turns first-time buyers into repeat customers and five-star reviewers.
Packaging ideas:
Mount each patch on a branded backer card with your logo and social handle.
Seal it in a clear cello sleeve for protection.
Add a thank-you note, application instructions, and a discount code for the next order.
Throw in a free sticker. It's a cheap surprise that people remember.
Shipping tips:
Use rigid or padded envelopes so patches don't bend or crease.
Add tracking to avoid "item not received" disputes.
State processing times clearly and ship on time. Speed builds trust.
Customer service:
Reply to messages quickly, fix problems generously, and ask happy customers for reviews. On marketplaces, reviews are one of the biggest ranking and trust factors.
Step 11: Scale From Side Hustle to Real Business
Once you've got consistent sales, grow with these strategies:
Expand winning designs. Turn a bestseller into a series or collection that collectors want to complete.
Launch limited drops. Scheduled releases create urgency and repeat traffic.
Offer custom orders. Clubs, teams, schools, and businesses need bulk custom patches, and B2B orders are often large and recurring.
Go wholesale. Pitch your line to gift shops, outdoor stores, and national park shops at around 50% of retail.
Add related products. Enamel pins, stickers, keychains, and patch-ready hats pair naturally with patches.
Build your own store. Move repeat customers from marketplaces to your website to protect your margins.
Legal Basics Every Patch Seller Should Know
A little legal awareness protects your shop from takedowns and account bans.
Don't copy trademarks or copyrighted characters. Logos from sports teams, movie characters, band names, and brand marks are protected. Selling them without a license can get your listings removed or your shop suspended. Create original designs, or license the IP properly.
Register your business according to your local rules. Requirements differ by country, state, and city.
Understand sales tax and VAT. Many marketplaces collect and remit tax automatically, but you may still have obligations when selling through your own website.
Protect your own designs. Keep your original files and dates. Consider trademarking your brand name once it grows.
This is general information, not legal advice. Check with a local professional for your specific situation.
Your 90-Day Roadmap: From Zero to Sales
Days 1–15: Research and design
Choose your niche and validate demand on Etsy and social media.
Create or commission 3 to 5 designs.
Request quotes and proofs from 2 or 3 manufacturers.
Days 16–35: Samples and setup
Order samples and approve the best supplier.
Place a small first batch (50 to 100 pieces of your top 2 or 3 designs).
Set up your Etsy shop or Shopify store and open social accounts.
Days 36–60: Launch
Photograph your patches and publish optimized listings.
Post short videos 3 to 5 times a week.
Share in niche communities and tell friends and family.
Aim for your first 10 sales and 5 reviews.
Days 61–90: Optimize and grow
Study which designs sell and which don't.
Reorder winners and drop losers.
Start an email list and plan your first limited drop.
Test a small ad budget on your bestseller.
Common Mistakes to Avoid When Selling Patches
Designing for everyone. A focused niche beats a generic catalog every time.
Skipping samples. Never sell a patch you haven't held in your hands.
Underpricing. Cheap prices signal low quality and leave no room for ads or discounts.
Weak photos. Blurry, flat-lay-only images kill conversions.
Missing size info. "How big is it?" is the most common patch question, so answer it upfront.
Ordering too much too soon. Start small, learn what sells, then scale.
Using copyrighted designs. One takedown can wipe out your shop.
Giving up too early. Most shops take a few months of consistent posting and tweaking to gain momentum.
Ready to Bring Your Patch Ideas to Life?
Every successful patch brand started with one design and one small batch. If you're ready to take the first step, [Your Brand] can help you turn your idea into high-quality, retail-ready patches, with design support, free proofs, and flexible order sizes for new sellers. Whenever you're ready, [request a free quote] and see what your first batch could look like.
Frequently Asked Questions (FAQs)
Is selling patches online profitable?
Yes. Patches often cost $1.50 to $3.00 to produce and sell for $8 to $15, so margins of 60% to 75% are common. Profit depends on your niche, pricing, marketing, and platform fees.
How much money do I need to start selling patches online?
Many sellers start with $200 to $500. That covers a first batch of 50 to 100 patches, samples, basic packaging, and marketplace fees. Print-on-demand lets you start with almost no upfront cost, though margins are lower.
What is the best platform to sell patches online?
Etsy is the best starting point for most beginners because buyers are already searching for patches there. Shopify is best for building a long-term brand with higher margins. Many successful sellers use both, plus Instagram or TikTok for discovery.
Do I need an embroidery machine to sell patches?
No. Most patch sellers work with a manufacturer that produces patches from their design. A machine only makes sense if you want to produce one-off custom pieces yourself.
What kind of patches sell best online?
Embroidered iron-on patches are the most popular overall. Hook-and-loop morale patches, outdoor and national park patches, biker patches, and funny slogan patches are consistently strong niches.
How many patches should I order for my first batch?
Start with 50 to 100 pieces per design across 2 or 3 designs. That's enough to get a lower per-unit price without risking too much on unproven designs.
Can I sell patches with logos or characters from movies and brands?
Not without a license. Trademarked logos and copyrighted characters are legally protected, and selling unlicensed versions can lead to removed listings, suspended accounts, or legal action. Stick to original designs.
How do I ship patches cheaply?
Patches are flat and light, so a rigid or padded envelope with tracking is usually the most cost-effective option. Mounting each patch on a backer card helps protect it in transit.
How long does it take to get my first sale?
With good photos, strong keywords, and regular promotion, many new sellers get their first sale within 2 to 6 weeks of launching. Consistency matters more than perfection.
How do I get repeat customers for my patches?
Release new designs regularly, create collectible series, include a discount code in every order, and build an email list for drop announcements. Collectors come back when there's always something new to add.
Final Thoughts
Learning how to sell patches online isn't about luck. It comes down to a clear process: choose a niche, design with purpose, source quality patches, price for real profit, list them well, and market consistently. Start small, listen to your customers, and double down on what works.
Your first patch sale is closer than you think. Pick your niche today, sketch your first design, and take the first step toward building a patch brand people are proud to wear.
Ready to Launch Your Patch Brand?
You've got the plan, so now you need patches worth selling. We make custom embroidered, woven, PVC, and chenille patches with low minimums, fast turnaround, and free design revisions, so you can test your first designs without a big upfront investment.
Send us your sketch or idea and our team will turn it into a free digital mockup, usually within 24 hours.
No setup fees. Free shipping. Quality you can sell with confidence.