
How to Sew a Patch on a Backpack: 8 Easy Steps for Beginners
Custom Patch House17 min read
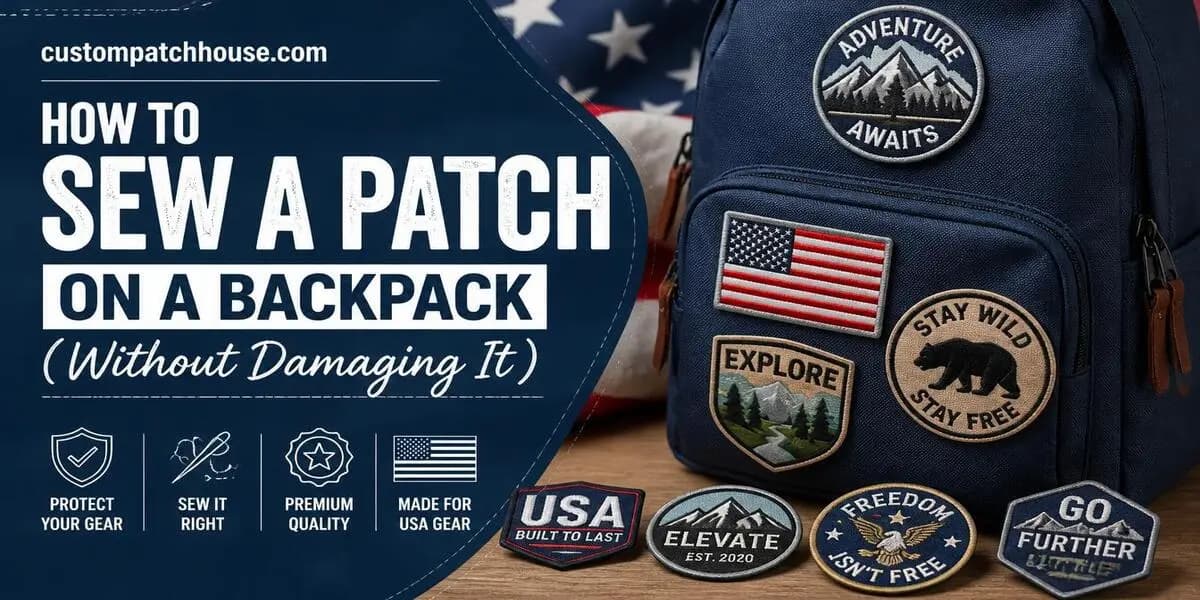
Want to personalize your backpack with an embroidered patch, favorite logo, or travel souvenir? Learning how to sew a patch on a backpack is easier than you might think. With a needle, strong thread, and a few simple stitches, you can attach a patch securely without needing a sewing machine.
Whether you have a canvas school bag, a hiking backpack, or an everyday polyester bag, the key is choosing the right placement, needle, and stitching technique. You also need to consider the backpack material before making permanent needle holes.
In this guide, we'll walk you through eight easy steps to sew a patch onto your backpack, explain which stitches work best, and share tips for avoiding common mistakes.
Quick Answer: How Do You Sew a Patch on a Backpack?
To sew a patch on a backpack, place the patch on a flat area, secure it with fabric clips or pins, and thread a needle with strong polyester thread. Start from inside the bag and stitch around the patch's border using a whip stitch or backstitch. Finish by tying a secure knot inside the backpack and trimming the excess thread.
For a small embroidered patch on an ordinary canvas backpack, the process often takes about 15–30 minutes, depending on your experience and the patch's size.
What Do You Need to Sew a Patch on a Backpack?
Before you start sewing, gather your supplies. Having everything ready makes the process smoother and helps you avoid uneven stitching.
Tools and materials | Why you need them |
Sew-on patch | The design you want to attach |
Sewing needle | A sharp needle suitable for your backpack fabric |
Polyester thread | Strong, durable stitching that resists everyday wear |
Fabric clips or pins | Keeps the patch in position |
Scissors | Cuts the thread neatly |
Thimble | Protects your finger when sewing through thick fabric |
Chalk or washable fabric marker | Helps mark the patch position |
Cardboard | Protects the opposite side or inner pocket from accidental stitching |
Seam ripper (optional) | Removes incorrect stitches without cutting the backpack fabric |
Which Needle and Thread Should You Use?
For most canvas or polyester backpacks, a sharp hand-sewing needle with a strong polyester thread works well.
Choose a needle that passes through the fabric without excessive force. Medium-weight canvas may work with a standard sharp needle, while thicker canvas may require a heavier-duty needle.
For the thread, all-purpose polyester is a practical choice because it offers good strength and abrasion resistance. Heavy-duty polyester thread can be useful for larger patches or backpacks that experience frequent outdoor use.
Match your thread to the patch border for less visible stitches, or choose a contrasting color for a decorative finish.
Helpful tip: Cut approximately 18–24 inches of thread to begin. Very long thread can tangle, while shorter lengths are easier to control.
If you're choosing a patch specifically for stitching, explore our custom sew-on patches, which are designed for permanent attachment to clothing, bags, and other suitable fabrics.
How to Sew a Patch on a Backpack by Hand: Step-by-Step
You don't need advanced sewing skills or expensive equipment to attach a patch. Follow these eight steps to get a clean, secure result.
Step 1: Choose the Best Spot for Your Patch
Start by deciding where you want your patch to appear.
The front panel of a backpack is usually a convenient location because it provides a visible area for logos, decorative patches, and embroidered designs.
Before choosing the exact spot, check the inside of the bag for pockets, padding, lining, and hidden compartments.
Avoid placing the patch directly over:
Thick seams or reinforced stitching
Zippers and pocket openings
Heavily padded sections
Backpack straps or attachment points
Waterproof seams or coated areas
Position your patch on the backpack and step back to check the alignment. If you're adding several patches, arrange them before sewing so you can plan the overall layout.
Pro tip: Take a quick photo of the patch placement. It can help you compare positions before making permanent stitches.
Step 2: Prepare Your Backpack and Patch
Empty your backpack completely and lay it on a clean, flat surface.
Smooth the fabric with your hands to remove wrinkles and folds. If the backpack has a removable insert or stiff backing panel, take it out if possible.
Inspect the patch's backing. A traditional sew-on patch usually has a fabric or non-adhesive backing, while an iron-on patch has a heat-activated adhesive layer.
You can sew many iron-on patches without applying heat first. In fact, skipping the iron is often safer for backpacks made from heat-sensitive synthetic materials.
If the backpack has multiple fabric layers, carefully separate the outer panel from the lining wherever possible. Insert cardboard behind the area you're sewing to help prevent the needle from catching the opposite side.
Step 3: Secure the Patch in Place
Once you're happy with the placement, keep the patch from shifting while you sew.
Use fabric clips where possible. On ordinary canvas, you can also use sewing pins, provided the material is not waterproof or prone to showing permanent holes.
For a round or square patch, secure opposite sides first. For an irregularly shaped patch, pay extra attention to corners and narrow sections.
Make sure the patch lies flat against the backpack without stretching or bunching the material.
Important: Avoid unnecessary pinholes in waterproof or coated fabrics. Each puncture can compromise the protective finish.
Step 4: Thread Your Needle and Tie a Knot
Cut about 18–24 inches of polyester thread and pass one end through the needle's eye.
You can use a single strand of suitable heavy-duty thread or double a standard thread for additional strength.
Tie a small, secure knot at the end.
For most patches, a thread color close to the border will make the stitches less noticeable.
Before beginning, check that your needle can pass through the backpack material comfortably. Never force a needle through a thick panel with your bare finger. Use a thimble or appropriate sewing tool.
Step 5: Start Sewing Around the Patch Edge
Now you're ready to make the first stitch.
If you can access the inside of the backpack, push the needle from the inside through the outer fabric near the patch edge. Bring it through the patch border and pull the thread until the knot rests securely against the inner fabric.
For a simple whip stitch, guide the needle over the patch edge and back through the backpack fabric. Repeat this movement around the perimeter.
Try to place each stitch approximately 1/8 inch (3 mm) apart as a starting point. Adjust the spacing for the patch's thickness, shape, and border.
Keep your stitches close enough to hold the patch securely without making the edge look crowded.
If your backpack has a separate lining, try to sew through the outer panel only.
Step 6: Continue Stitching Around the Entire Patch
Continue working around the patch border, maintaining even stitch spacing and consistent tension.
The thread should hold the patch firmly against the backpack without pulling the surrounding fabric into wrinkles.
For round patches, follow the curved edge gradually. For square or rectangular patches, place additional secure stitches near the corners because these areas may catch on other objects.
If you notice the fabric puckering, loosen the tension slightly.
Stop occasionally to check the patch's position and make sure the needle hasn't caught an internal pocket or lining.
Pro tip: Don't pull each stitch as tightly as possible. Firm, even tension produces a cleaner result than excessive force.
Step 7: Secure the Final Stitch and Tie Off the Thread
When you reach your starting point, make one or two small securing stitches near the first stitch.
Bring the needle to the inside of the backpack.
Pass it under a nearby stitch to create a small loop, guide the needle through the loop, and pull gently to form a knot.
Repeat once for additional security.
Trim the remaining thread, leaving a short tail so the knot is less likely to slip.
Avoid cutting too close to the knot, as this can cause the stitches to loosen over time.
Step 8: Inspect Your Finished Backpack Patch
Once the patch is attached, inspect the entire border.
Check that:
All edges lie flat against the backpack.
No corners are lifting.
The stitches are evenly spaced.
The fabric isn't excessively puckered.
No internal pockets have been accidentally sewn shut.
The thread ends are secured.
Gently lift the patch edge with your fingertips. If any section feels loose, add a few extra stitches.
Your backpack now has a personalized patch that's ready for everyday use.
Want to Add Patches to Other Accessories?
Once you've learned how to sew a patch on a backpack, you can use similar hand-sewing techniques to personalize other accessories. Beanies are another great option for displaying embroidered patches, although their stretchy fabric requires a little extra care to prevent puckering. If you're planning your next DIY project, check out our guide on How to Sew a Patch on a Beanie: 5 Easy Steps for beginner-friendly instructions.
Which Stitch Is Best for Sewing Patches on Backpacks?
The best stitch depends on your patch border, backpack material, and how much wear the bag receives.
Stitch type | Best for | Main advantage |
Whip stitch | Most embroidered patches | Securely wraps around the border |
Running stitch | Lightweight patches on accessible fabric | Simple and quick |
Backstitch | Patches needing a stronger seam | Creates a continuous, secure line |
Blanket stitch | Decorative patches | Adds a visible stitched edge |
Whip Stitch: Best for Most Beginners
A whip stitch is one of the easiest ways to attach an embroidered patch to a backpack.
It involves passing the needle through the patch border and backpack fabric, then bringing the thread around the edge.
This technique works especially well for patches with raised, merrowed borders because the stitching can blend into the finished edge.
Running Stitch: Best for Simple Projects
A running stitch moves the needle in and out of the fabric along the patch border.
It's quick and beginner-friendly, although longer stitches can be more vulnerable to snagging. Use short, even stitches and reinforce any areas that may experience extra wear.
Backstitch: Best for a Stronger Seam
A backstitch creates a more continuous line of stitching by bringing each new stitch backward to meet the previous one.
It takes longer than a running stitch but provides a secure attachment for patches that need to withstand frequent handling.- Step 8: Inspect Your Finished Backpack Patch
Blanket Stitch: Best for Decorative Borders
A blanket stitch creates a visible looped pattern around the patch edge.
It's a good option if you want the stitching to become part of the backpack's appearance rather than remain hidden.
For most first-time projects, a whip stitch with strong polyester thread is an excellent starting point.
How to Sew Patches on Different Backpack Materials
Not all backpacks are made from the same fabric. Canvas, nylon, polyester, leather, and waterproof materials respond differently to needles, stitching, and heat.
Understanding these differences helps prevent permanent damage.
Sewing a Patch on a Canvas Backpack
Canvas is one of the easiest backpack materials for hand sewing because its woven structure generally provides a stable surface for stitching.
Use a sharp needle and polyester thread, and avoid areas with multiple thick fabric layers.
A whip stitch or backstitch usually works well for attaching embroidered patches to canvas.
If the canvas is heavily waxed or treated for water resistance, remember that needle holes may affect its protective finish.
Sewing a Patch on a Nylon Backpack
Nylon backpacks are lightweight and often durable, but some use thin coatings or tightly woven fabrics that can show needle holes.
Use a suitable sharp needle and avoid repeatedly puncturing the same spot.
Keep the thread tension moderate to prevent the fabric from gathering around the patch.
Avoid using a hot iron unless the backpack manufacturer explicitly confirms that the material and coating can tolerate the required temperature.
Sewing a Patch on a Polyester Backpack
Polyester backpacks can be suitable for sewing patches, but the fabric may be thin, tightly woven, or coated.
Choose a needle that passes cleanly through the fabric without creating unnecessarily large holes.
Secure the patch with even stitches and avoid pulling the thread too tightly.
As with nylon, check the care label before considering any heat-based attachment method.
Sewing a Patch on a Leather Backpack
Leather requires a different approach because needle holes remain visible after stitching.
A leather needle, suitable thread, and carefully planned stitch placement are important. Thick leather may require specialized equipment or professional sewing assistance.
If the backpack is expensive or made from heavy leather, consider having the patch attached by a professional leatherworker.
Sewing a Patch on a Waterproof Backpack
Waterproof backpacks require special care.
Stitching creates holes in the fabric, coating, or waterproof membrane. These punctures can allow water to enter, even when the patch itself is securely attached.
For bags with waterproof coatings or sealed seams, consider removable attachment methods or professional repair techniques.
If you must sew the patch, use the fewest practical punctures and check whether a compatible seam-sealing product can be applied afterward. Seam sealing may reduce leakage but does not guarantee restoration of the original waterproof performance.
Important: Avoid sewing through critical waterproof panels on dry bags or equipment intended to protect electronics and other moisture-sensitive items.
Can You Sew an Iron-On Patch onto a Backpack?
Yes. Many iron-on patches can also be attached using needle and thread.
An iron-on patch has a heat-activated adhesive layer, but the patch itself can often be stitched around the border.
This can be useful when you want a more secure attachment or when the backpack material isn't suitable for ironing.
For cotton canvas backpacks, you may be able to apply the patch with heat first and then reinforce the edges with stitching. However, always follow the patch's application instructions and the backpack manufacturer's care guidance.
For nylon, polyester, coated fabrics, and waterproof backpacks, sewing without heat is often the safer choice, provided puncturing the fabric is acceptable.
Never assume that a backpack can tolerate a high-temperature iron simply because the patch has iron-on backing.
If you're comparing attachment methods, our custom iron-on patches page explains how heat-activated patch backing works.
How to Attach a Patch to a Backpack Without Sewing
Sewing is a reliable attachment method, but it isn't always the best option.
If you want to attach a patch without using a needle, consider the following alternatives.
1. Iron-On Patches
Iron-on patches use heat-activated adhesive to bond with compatible fabrics.
They can work well on certain cotton or canvas bags, but they're not appropriate for every backpack.
Always check the material and care instructions before applying heat.
2. Hook-and-Loop Patches
Hook-and-loop patches, often called Velcro patches, are a convenient choice for backpacks with compatible loop panels.
The patch can be attached and removed without sewing directly through the backpack panel.
This option is popular for tactical backpacks, range bags, travel gear, and military-inspired designs.
Explore our custom Velcro patches if you want a removable design that can be swapped between compatible bags and equipment.
3. Fabric Adhesive
Some fabric adhesives can attach lightweight patches without stitching.
However, adhesion depends on the patch backing, backpack material, surface coating, and exposure to moisture.
Adhesive may not bond reliably to water-repellent or coated fabrics. Always test a small, inconspicuous area and follow the product instructions.
For backpacks used frequently outdoors, stitching or a suitable removable attachment system is generally more dependable than ordinary craft glue.
Common Mistakes to Avoid When Sewing a Patch on a Backpack
Even a simple sewing project can go wrong if you overlook a few details.
1. Choosing the Wrong Patch Location
Sewing over a zipper, thick seam, or internal pocket can make the job difficult and may interfere with the backpack's function.
Always inspect both sides of the fabric before placing the patch.
2. Pulling the Thread Too Tight
Excessive thread tension can cause wrinkles and puckering.
Keep the stitches snug, but allow the backpack fabric to lie naturally.
3. Using Weak Thread
Thin or unsuitable thread may break under repeated friction.
Choose good-quality polyester thread appropriate for the patch and fabric.
4. Making Stitches Too Far Apart
Widely spaced stitches can allow patch edges to lift and catch on nearby objects.
Use relatively short, consistent stitches, especially around corners.
5. Sewing Through the Inner Lining
Accidentally stitching through a pocket or lining can make compartments difficult to use.
Use a cardboard insert and keep the fabric layers separated when possible.
6. Ignoring Waterproof Coatings
Needle holes can compromise water resistance.
Before sewing, determine whether permanent punctures are acceptable for your backpack.
7. Applying Too Much Heat
High temperatures can damage synthetic fabrics, coatings, and padding.
Never use a very hot iron on a backpack without checking the manufacturer's instructions.
How to Care for a Sewn-On Backpack Patch
Once you've attached your patch, a little maintenance can help it stay in good condition.
Check the stitches occasionally, particularly after hiking trips, school use, or travel.
If a corner begins to lift, reinforce it with a few stitches before the loose section catches and tears.
When cleaning your backpack, follow the manufacturer's care instructions. Spot cleaning is often preferable to unnecessary machine washing, especially for bags with coatings, padding, or specialized materials.
Use a soft cloth or brush to remove dirt around the patch border. Avoid harsh scrubbing that could damage embroidered threads.
If a stitch breaks, replace it promptly to prevent the surrounding stitches from loosening.
Personalize Your Backpack with Custom Patches from Custom Patch House
A backpack patch is a simple way to show your personality, celebrate a trip, represent your team, or display your favorite design.
Whether you're decorating a school backpack, travel bag, hiking pack, or everyday carry bag, choosing the right patch makes the finished project more personal.
At Custom Patch House, we help customers across the USA turn their logos, artwork, and ideas into personalized patches.
As a custom patch maker, we offer different shapes, sizes, colors, and backing options to match your project. Our custom embroidered patches, also known as custom embroidery patches, are a popular choice for backpacks because of their textured stitching and classic appearance.
You can also choose sew-on or removable hook-and-loop backing depending on how you want to attach your design.
With no minimum order, free artwork assistance, and a digital proof before production, you can order a single patch or a larger quantity for your group.
Frequently asked questions
- Can you sew a patch onto any backpack?
- You can sew patches onto many fabric backpacks, including canvas, nylon, and polyester bags. However, some materials require special tools or precautions. Waterproof, coated, heavily padded, and leather backpacks may be more difficult to stitch and can suffer permanent needle-hole damage.
- Can I sew a patch on a backpack without a sewing machine?
- Yes. You can sew a patch onto a backpack by hand using a needle, strong thread, and a basic whip stitch or backstitch. A sewing machine is not necessary for most small embroidered patches.
- What is the best thread for sewing patches on backpacks?
- Polyester thread is a good choice for most backpack patches because it offers strength and resistance to everyday wear. Heavy-duty polyester thread can be useful for thicker materials and larger patches.
- How long does it take to sew a patch onto a backpack?
- A small patch on an accessible canvas panel may take around 15–30 minutes to sew by hand. Larger patches, thick fabrics, and intricate shapes can take longer, especially if you're new to sewing.
- Can you sew an embroidered patch onto a nylon backpack?
- Yes, provided the nylon fabric and its coating can tolerate needle punctures. Use a suitable needle, avoid excessive tension, and be careful not to damage the lining or waterproof finish.
- Can you sew an iron-on patch instead of ironing it?
- Yes. Many iron-on patches can be stitched around the border without activating the adhesive. This is useful when heat isn't appropriate for the backpack material or when you want additional attachment security.
- What is the strongest stitch for attaching a backpack patch?
- A closely spaced backstitch provides a strong, continuous seam. A well-executed whip stitch is also a reliable option, especially for embroidered patches with raised borders.
- Can you remove a sewn-on patch from a backpack?
- Usually, yes. Carefully cut the attachment stitches with a seam ripper and lift the patch away. However, needle holes, fading, and impressions may remain visible, particularly on leather, coated nylon, and tightly woven fabrics.
- Will sewing a patch make my backpack less waterproof?
- It can. Sewing creates needle holes that may allow moisture to pass through waterproof coatings or membranes. Consider a removable patch system if preserving water resistance is essential.
- Is it better to sew or iron a patch onto a backpack?
- Sewing is generally a more dependable long-term attachment method for suitable fabrics. Iron-on patches are faster to apply, but heat and adhesive compatibility vary by backpack material. For nylon, polyester, or coated bags, avoid heat unless the manufacturer approves it.